
Dependency Management for AWS Lambda
Every developer uses libraries that provide functionality and minimize development effort. In “conventional” software development, the integration of additional software packages is usually not a problem (ignoring security-related network restrictions). In the case of software development for the serverless compute service of AWS, Lambda, however, problems can occur. This article examines the problem and discusses possible solutions using the example of a lambda function with Python 3.6 runtime.
The Problem
AWS Lambda supports multiple languages by using various runtimes. You choose a runtime when a function is created and can change it if necessary. The underlying execution environment provides libraries and environment variables that the function code can use or access.
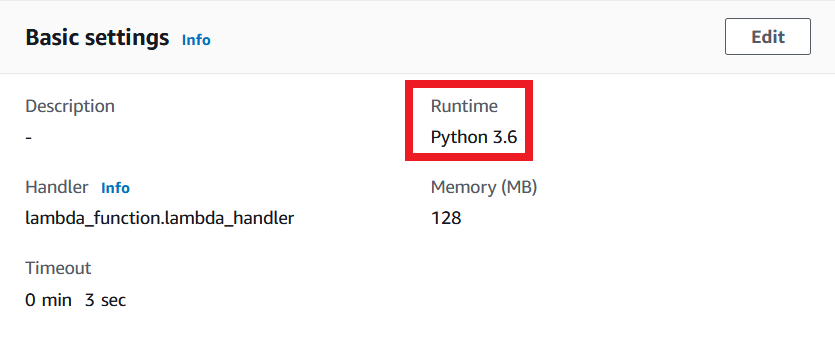
For example, if you choose Python 3.6 as runtime, the AMI “Amazon Linux” with Linux kernel “4.14.171-105.231.amzn1.x86_64” is used (see also https://docs.aws.amazon.com/lambda/latest/dg/lambda-runtimes.html). However, if you need libraries in the code that are not included in the AMI, these must be made available to the Lambda function, since the libraries cannot be imported as usual.
If you want to use the well-known pandas library, the lambda function will already encounter problems during the import of pandas und print out the following error statement:
Unable to import module 'lambda_function': No module named 'pandas'The Solution
Fortunately, AWS has considered this problem and provided several possible solutions. Before discussing possible solutions, an important note that applies to all solutions: Many libraries are published for specific versions of a runtime. Therefore it is important to check the required libraries concerning their runtime version (e.g. via https://pypi.org/). Using pandas as an example, the following packages are available (source: https://pypi.org/project/pandas/#files, 01.07.2020):
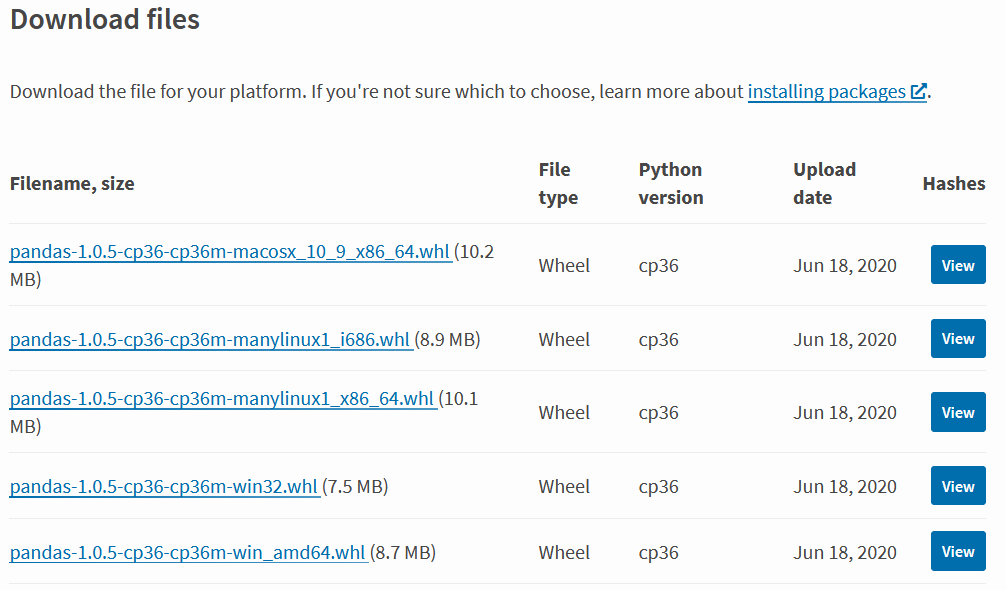
Here you can see that the Python version for pandas is currently Python 3.6, so the runtime of the Lambda function should be set accordingly:
So how do you provide Lambda with the required libraries? There are several possible solutions:
- Manually installing .whl- or tar.gz-files
- Installing with “target” option of pip
- The use of AWS Lambda Layers
To choose the right package, you need to know that Amazon AMIs use a *.x86_64″ kernel. Therefore, you must select packages that are designed for this kernel:
*-manylinux1_x86_64.whlInstalling .whl or tar.gz files manually
Here the corresponding libraries are explicitly added to the directory where the function code is located. The corresponding package (pandas in this example) is downloaded as a .whl or .tar.gz file and moved to the directory of the importing lambda function. The following package must be selected for pandas (see Figure 2),
pandas-1.0.5-cp36-cp36m-manylinux1_x86_64.whlmoved to the corresponding folder and unzipped with
unzip pandas-1.0.5-cp36-cp36m-manylinux1_x86_64.whl(e.g. with the Cmder console, which provides Linux commands under Windows: https://cmder.net/). In the case of pandas, two additional packages must be installed:
- numpy
- pytz
Afterwards you should remove any artifacts that are not needed:
rm -r *.whl *.dist-info __pycache__The final directory should look as follows:

Finally, select all files, including function code, and add them to a .zip file. This can now be used in Lambda instead of the function code:

Cloud 9 (development editor in Lambda) can only display code up to a size of 3MB, which is why the editing option in the browser is usually not available.
Install with “target” option from pip
Instead of installing all packages manually, you can use a package manager like “pip”. With the help of the “target” flag, you can specify in which folder the package should be installed:
pip install --target ./<<dir>> pandasAdditionally, the “–no-deps” flag can be used. This will only download the library and not its dependencies. Thus the size of the deployment package does not inflate unnecessarily.
Afterward you create a -zip-file similar to solution 1 and upload it to AWS Lambda. See also: https://docs.aws.amazon.com/lambda/latest/dg/python-package.html#python-package-dependencies
This option saves time compared to 1, but has the consequence that the deployment package can be unnecessarily bloated.
Lambda Layers
The most “AWS-native” solution is the use of so-called Lambda Layers. These have to be configured once and can then be used to focus on code development, bypassing the repeated upload of zip files if code changes require a new upload.
For preparation, the corresponding libraries have to be downloaded using one of the two procedures presented and structured runtime-specific and packed in a .zip file. For Python the structure is as follows:
lambda_layer_package.zip
├───python
  ├───numpy
  │   ├───[subfolders...]
  ├───pandas
  │   ├───[subfolders...]
  └───[additional package folders...]
Other programming languages require similar folder structures, see also https://docs.aws.amazon.com/lambda/latest/dg/configuration-layers.html#configuration-layers-path.
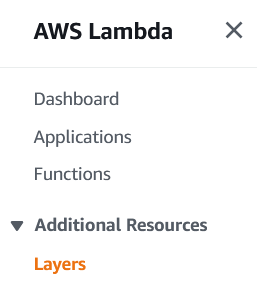
To use a layer, you create it in the main menu of Lamba by selecting the option “Layers” (see picture) and then create a layer by clicking the button “Create Layer”.
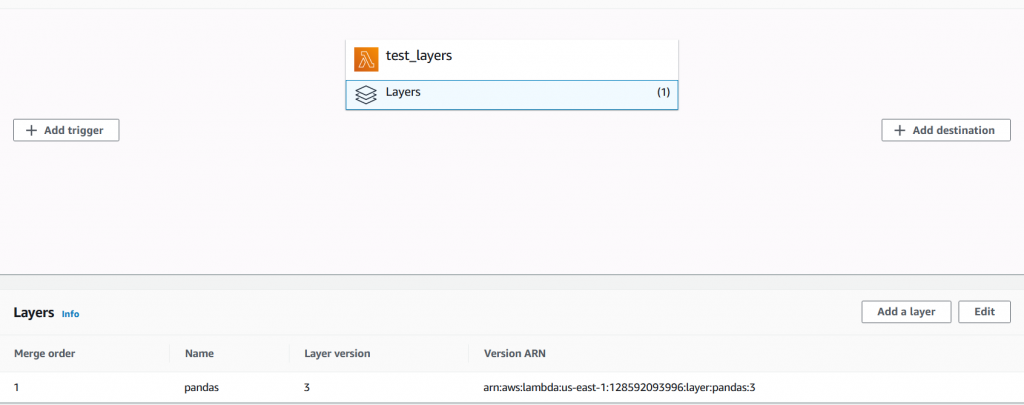
In the Create dialog, select Name, Dependency Package and a Runtime according to the Lambda function. Then add the appropriate layer in the “Design” tab of the Lambda function:
Using layers provides developers with some advantages. First and foremost, they can focus on the business logic of their application instead of worrying about dependency management. Once a layer is created and configured, the deployment of new code becomes convenient since the redeployment of dependencies is now obsolete.
Another advantage is the fact, that layers can be reused in other functions and even versioned which saves time and therefore cost.
In case you use Lambda Layers, keep in mind that the total size of the deployment package can not exceed 250MB (unzipped)!
More information about Lambda Layers: https://docs.aws.amazon.com/lambda/latest/dg/configuration-layers.html